websim - The Guide
Table of Contents
1. Share Links
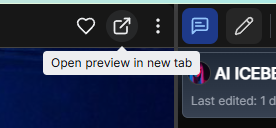
Clicking the open preview in new tab button on any Websim will navigate you to the project in fullscreen!
Profiles have share links as well - Take a look at https://kasaneteto.on.websim.ai to see an example. Just open the preview in new tab button while on a profile page, or put your username before .on.websim.ai/ to start sharing your full screen profile off-site
2. Selecting your AI model
Websim uses state of the art AI models by companies such as OpenAI, Anthropic, Deepseek, Google Gemini and more. In order to change which model you are using to code your project, click on the dropdown menu in your prompt bar.
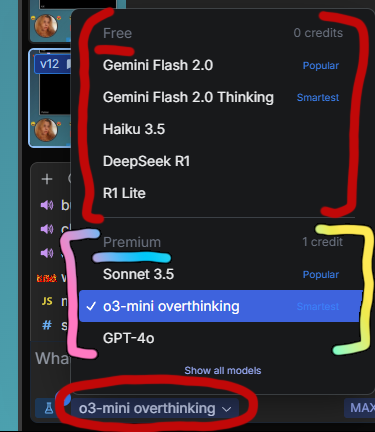
Models at the top of the list are in our free category, while models under the premium category are still available to all users, but cost 1 credit per run.
New models are released regularly so this list will change over time.
3. Credits and Plans
Running Websim and especially the AI models is expensive. For this, we have a system of credits to balance usage rates. All users have access to a minimum of 25 Credits per day. Users in the Websim Creator Program or with paid subscriptions will have access to a higher amount of Credits per day. For all users, Credits reset at 00:00 UTC.
There are two tiers of models:
- Free models: Cost 0 credits to run, and can therefore be used near indefinitely.
- Premium models: Cost 1 credit to run, and can be used by any user with Credits.
To see a breakdown of our current subscription plans, please visit https://websim.ai/plan.
4. Advanced Abilities
4.1 Language Model Integration
The Language Model ability allows your websim to generate AI responses dynamically without creating a new page. This enables interactive AI features within your existing page.
Example: Check out this Theme Generator where clicking a button triggers an AI response to change the site's theme. The prompt used was "use ai to make a button that changes the theme of the site randomly".
4.2 Multiplayer Capabilities
The Multiplayer ability enables real-time interaction between users in your websim. It can be used for chat rooms, collaborative tools, or persistent data storage for forums and social features.
Example: Try this Multiplayer Chat Room to see real-time interaction in action. The prompt used was simply "make me a multiplayer chatroom".
4.3 Metadata API
The Metadata API ability allows your websim to access user data like avatars, likes, and projects. It's activated by including 'profile' or 'metadata' in your prompt.
Example: Here's a Custom Profile Page created with the prompt "make a profile page for kat".
5. Thinking Output
Some models are able to use reasoning abilities to plan out their actions. Clicking this brain icon will allow you to see the thinking output.

6. View Source
You can directly edit, preview and save changes to your websim's files using the View Source button:
The plus icon allows you to upload your own files (tons of filetypes are supported!), or use the magnifying glass icon to access the asset browser.
At the bottom of the window, you'll notice a number (3.7k in this example) which indicates the token size of your project. Tokens are simply a numerical representation of the amount of computation the AI is outputting for that project.
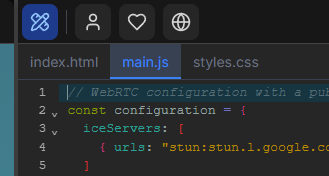
Here is how to view and edit the source code of each individual file
Note: Tokens are simply a numerical representation of the amount of computation the ai is outputting for that project.
8. Multifile
Multifile is websim's newest major feature. Simply put, it allows your projects to become larger without running into as many issues with complexity.
The AI is able to split projects from one large file into smaller separate files that can work in tandem. This allows the AI to target specific files when making future updates, reducing the complexity of the prompt to just the complexity of the specified file the AI works on for a given prompt. These files are shown in the same menu as added assets. You can also directly edit these files in your View Source menu.
7. Assets
You can add your own assets to websim projects by using the plus icon:
The plus icon allows you to upload your own files (tons of filetypes are supported!), or use the magnifying glass icon to access the asset browser. When an asset is uploaded to Websim and passes automated content moderation checks, it is then automatically added to the global Asset Browser.
The asset browser contains numerous user-uploaded images, audio files, and 3D models. Add assets by clicking the blue plus icon in the corner of each item.
Using Assets: When you add assets, your project enters a 'draft' state. To use these assets, type @ in your prompt to see a list of available assets. Select an asset and specify how to use it, like "use @background.mp3 for the background music". Sending the prompt will return your project to normal state.
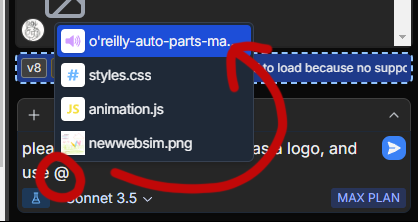
Files in multifile are also treated as assets, and can be referred to using this @ method as well. See the multifile section for an example!
9. Changing Prompt Audio
You are now able to set a custom sound for the audio that plays when you finish a prompt! To do so, start with navigating to your settings menu by tapping the 3 dots menu in the top right of Websim.
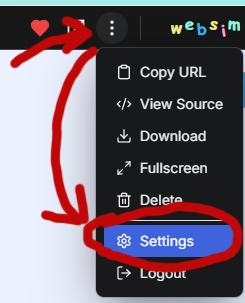
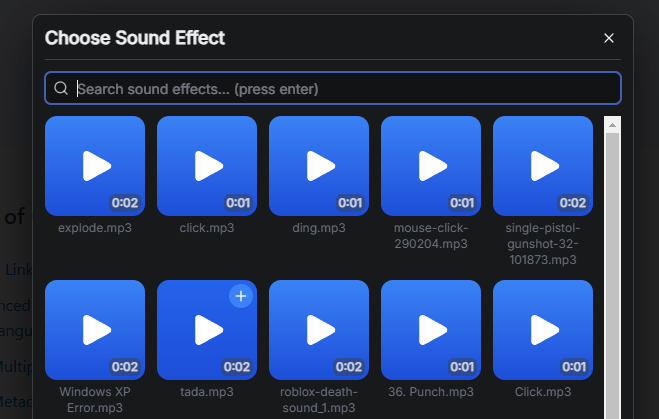
Next, you will want to find the setting titled 'Sound' and beneath it, 'Custom Effect.' To change your sound effect, click 'Browse'.

This will take you to the Sound Effects (SFX) section of the Websim Asset Browser. Here, you can preview any sound and select it as your custom prompt completed sound effect.